34.3 在 Nginx 部署
如果需要精简发布后的文件,也就是删除不必要的文件夹,可以编辑 Web 项目的 .csproj 并添加 <SatelliteResourceLanguages>en-US</SatelliteResourceLanguages>,如:
<PropertyGroup>
  <TargetFramework>net6.0</TargetFramework>
  <SatelliteResourceLanguages>en-US</SatelliteResourceLanguages>
</PropertyGroup>
若无需生成 .pdb 文件,可以继续添加:
<PropertyGroup Condition=" '$(Configuration)' == 'Release' ">
  <DebugType>none</DebugType>
  <DebugSymbols>false</DebugSymbols>
</PropertyGroup>
34.3.1 关于 Nginx 部署
Nginx 是一款高性能的 HTTP 服务器/反向代理服务器及电子邮件(IMAP/POP3)代理服务器。
由俄罗斯的程序设计师 Igor Sysoev 所开发,支持同时处理上万个并发连接,并且 CPU、内存等资源消耗却非常低,运行非常稳定。
34.3.2 安装 Nginx
Unix/Linux/Mac OS系统
sudo apt-get update
sudo apt install nginx

sudo systemctl start nginx
sudo systemctl enable nginx
sudo systemctl status nginx
Windows系统
- 打开
Nginx官网下载 https://nginx.org/en/download.html,如:nginx/Windows-xxx版本 - 打开
NSSM官网下载 nssm 2.24 解压,进入win64目录并在该目录下打开PowerShell或CMD控制台并输入:
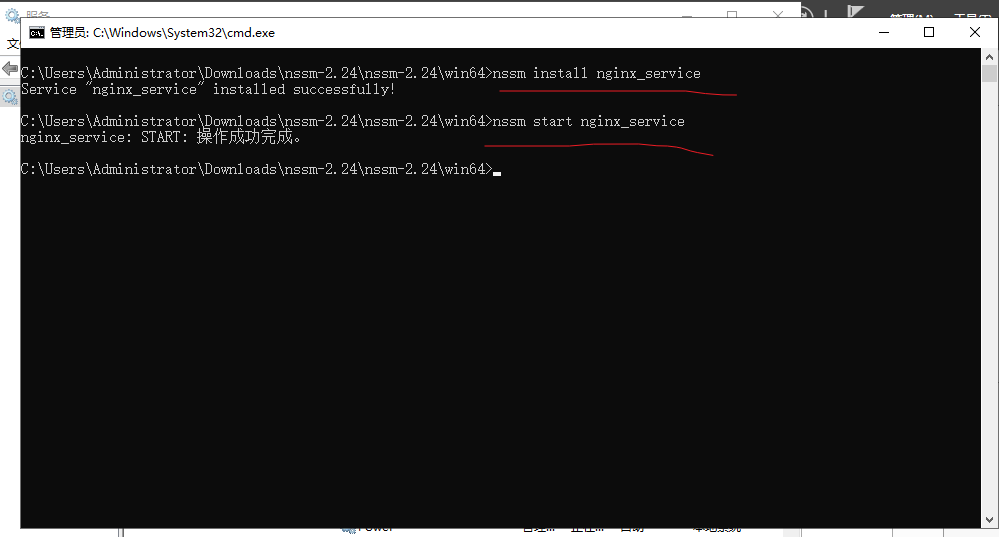
nssm install nginx_service
如果是 PowerShell 可通过下面方式
./nssm.exe install nginx_service
- 添加
nginx.exe添加为Windows服务并设置随机启动
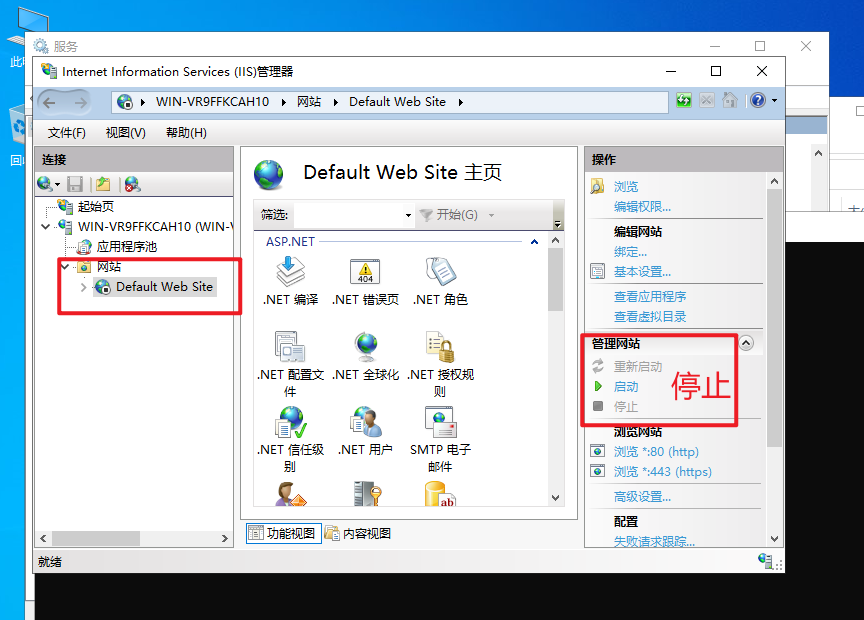
如果你的 Windows 服务已经安装了 IIS,那么需要停止 80 端口的站点。后续安装好 nginx 之后,可以通过 proxy_pass 转发到任意端口。
添加 nginx.exe 路径并点击 Install service。
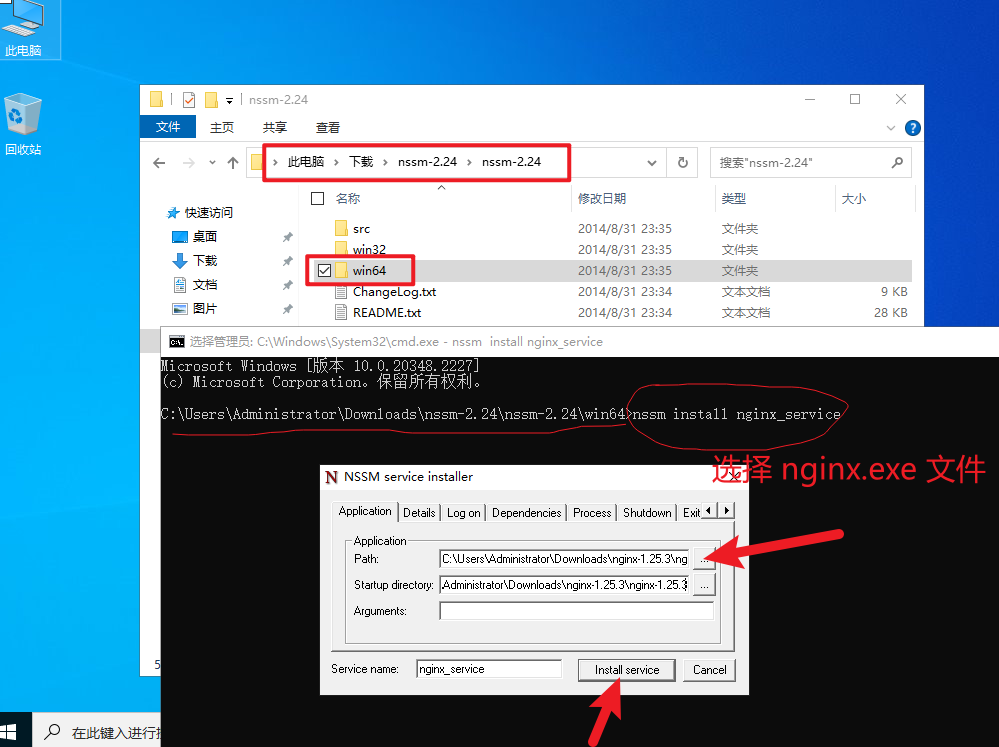
- 启动
nginx_service服务
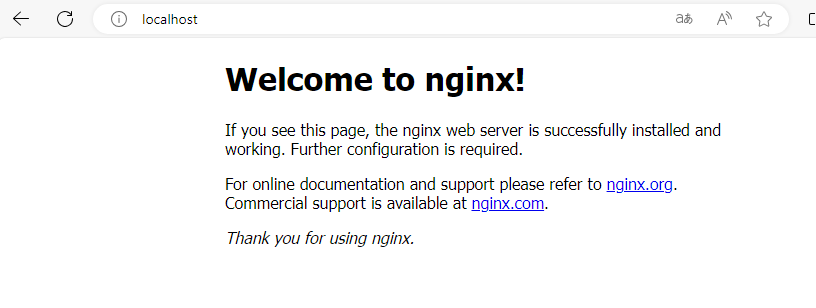
最后,打开浏览器访问 http://localhost 出现以下内容说明已成功安装。
34.3.3 Nginx 网站配置
34.3.3.1 部署 ASP.NET Core 网站
可通过 pm2 或 IIS 或其他方式将 ASP.NET Core 网站部署到非 80/443 端口,如下面例子 8090 端口。
- 查看
PM2部署文档:34.6 pm2 部署 (推荐) - 查看
IIS部署文档:34.1 在 IIS 部署 - 查看
Windows Service部署文档:34.8 Windows Service 部署
使用了 Nginx 反向代理后可能会出现获取不到客户端真实的 IP 地址,这时需要在 Startup.cs 中添加 IP 地址转发配置:
public void Configure(IApplicationBuilder app, IWebHostEnvironment env)
{
    app.UseForwardedHeaders(new ForwardedHeadersOptions
    {
        ForwardedHeaders = ForwardedHeaders.XForwardedFor | ForwardedHeaders.XForwardedProto
    });

    // 其他代码...
}
如果添加以上配置之后获取的还是 Nginx 代理服务器的地址,那么可以尝试使用以下配置:
// 注册服务
services.Configure<ForwardedHeadersOptions>(options =>
{
    options.ForwardedHeaders = ForwardedHeaders.All;
    options.KnownNetworks.Clear();
    options.KnownProxies.Clear();
});

// 中间件(确保第一个注册)
app.UseForwardedHeaders();  // 无需参数
34.3.3.2 找到 Nginx 配置目录
Unix/Linux/Mac OS系统
进入 /etc/nginx/conf.d/ 目录
cd /etc/nginx/conf.d/
Windows系统
进入 nginx.exe 所在目录的 conf 目录
cd C:\nginx-1.25.3\nginx-1.25.3\conf
34.3.3.3 添加网站配置
在 conf.d 或者 conf 目录中添加 furion.net.conf(推荐使用自己的域名,如:xxxx.com.conf)文件,并写入以下内容
http {
  map $http_connection $connection_upgrade {
    "~*Upgrade" $http_connection;
    default keep-alive;
  }

  server {
      listen 80;
      listen [::]:80;
      server_name furion.net; # 没有域名可不写
      location / {
          proxy_pass http://localhost:8090; # 设置为本地启动地址
          proxy_http_version 1.1;
          proxy_set_header   Upgrade $http_upgrade;
          proxy_set_header   Connection $connection_upgrade;
          proxy_set_header   Host $host;
          proxy_cache_bypass $http_upgrade;
          proxy_set_header   X-Forwarded-For $proxy_add_x_forwarded_for;  # 解决获取不到真实的用户 IP 地址
          proxy_set_header   X-Forwarded-Proto $scheme;   # 解决获取不到真实的用户 IP 地址
      }
  }
}
34.3.3.4 重启/重载 Nginx 配置
Unix/Linux/Mac OS系统
sudo systemctl restart nginx
也可以将只重载配置 nginx -s reload。
Windows系统
nssm restart nginx_service
也可以打开 运行(Win + r)输入 services.msc,并找到 nginx_service 服务重启。
34.3.4 HTTPS 配置
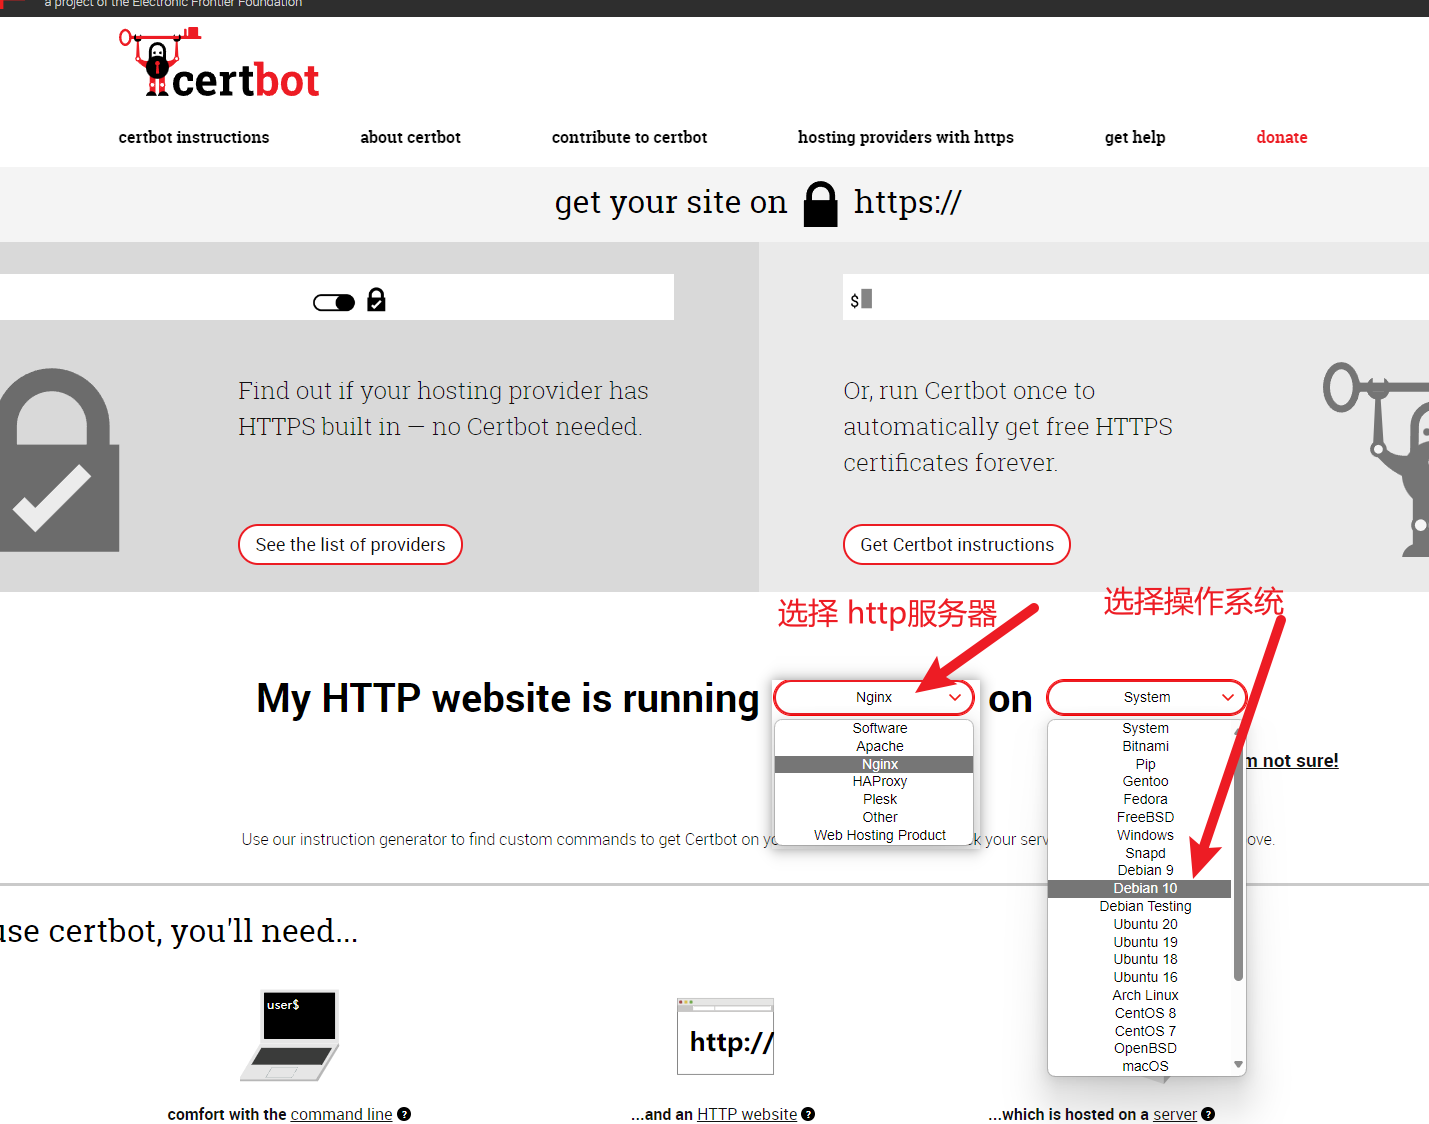
为了提高网站的安全性,配置 tsl/ssl 证书是必备操作。在这里推荐大家使用 certbot 生成免费的 https 证书(支持自动续期)。
- 打开 https://certbot.eff.org/ 网站
- 选择
HTTP服务器工具和对应的操作系统,之后将自动跳转到对应的教程,按照教程操作即可。
除了使用 certbot 的方式以外,也可以购买或者使用第三方提供的 https 证书。
对于 Windows IIS 使用 certbot 可参考:https://www.cnblogs.com/ziye/p/9208353.html,https://www.chinassl.net/ssltools/convert-ssl.html
- 修改你的网站
xxxx.com.conf配置,替换为以下内容。
http {
  map $http_connection $connection_upgrade {
    "~*Upgrade" $http_connection;
    default keep-alive;
  }

  server {
      listen 443 ssl;

      ssl_certificate /etc/letsencrypt/live/furion.net/fullchain.pem;
      ssl_certificate_key /etc/letsencrypt/live/furion.net/privkey.pem;

      ssl_session_cache shared:SSL:1m;
      ssl_session_timeout 5m;

      ssl_ciphers ECDHE-RSA-AES128-GCM-SHA256:ECDHE:ECDH:AES:HIGH:!NULL:!aNULL:!MD5:!ADH:!RC4;
      ssl_protocols TLSv1.1 TLSv1.2 TLSv1.3;

      ssl_prefer_server_ciphers on;

      server_name furion.net; # 没有域名可不写

      location / {
          proxy_pass http://localhost:8090; # 设置为本地启动地址
          proxy_http_version 1.1;
          proxy_set_header   Upgrade $http_upgrade;
          proxy_set_header   Connection $connection_upgrade;
          proxy_set_header   Host $host;
          proxy_cache_bypass $http_upgrade;
          proxy_set_header   X-Forwarded-For $proxy_add_x_forwarded_for;  # 解决获取不到真实的用户 IP 地址
          proxy_set_header   X-Forwarded-Proto $scheme;   # 解决获取不到真实的用户 IP 地址
      }
  }

  server {
      listen 80;
      listen [::]:80;

      server_name furion.net; # 没有域名可不写

      rewrite ^(.*)$ https://$host$1 permanent;   # http 自动重定向到 https
  }
}
- 重启/重载
Nginx配置即可。
34.3.5 反馈与建议
给 Furion 提 Issue。
想了解更多 Nginx 部署 ASP.NET Core 知识可查阅 https://learn.microsoft.com/zh-cn/aspnet/core/host-and-deploy/linux-nginx?view=aspnetcore-8.0&tabs=linux-ubuntu